- Step 1 – Choose the location for your indoor unit.
- Step 2 – Install the mounting bracket for the indoor unit on the wall.
- Step 3 – Drill a hole through the wall for the refrigerant lines, electrical wiring, and drain line.
- Step 4 – Run the refrigerant lines, electrical wiring, and drain line through the hole and connect them to the indoor unit.
- Step 5 – Mount the outdoor unit on a flat surface outside the house.
- Step 6 – Connect the refrigerant lines from the outdoor unit to the indoor unit.
- Step 7 – Connect the electrical wiring from the outdoor unit to the indoor unit.
- Step 8 – Connect the drain line from the indoor unit to the outdoor unit.
- Step 9 – Turn on the power to the outdoor unit.
- Step 10 – Test the system to make sure it’s working properly.
A ductless mini-split is one of the most efficient ways to heat and cool your home. They’re the perfect choice for garages or rooms where ductwork is unavailable. Many splits are energy-efficient, quiet, and easy to install. You can follow these 8 essential tips for installing an air conditioning unit if you’re up for a challenge but you can always call a professional air conditioning contractor to help you with that.
Like central systems, the mini-split AC is comprised of two units, an outdoor compressor/condenser, and an indoor air-handling unit. The components are connected by copper tubing which allows a necessary refrigerant to circulate. A handheld remote gives you thermostatic control over the system. In this post, we will be guiding you on how to install a ductless mini-split AC.
Before you begin the installation, ensure you have all the parts you need according to the installation manual. Make sure to inspect the various components to ensure there are no defects before installation work begins. You can complete the majority of the installation yourself however the last 10% of the work should be completed by a trained professional.
Proper installation is crucial to achieving maximum performance and energy savings the unit can produce. It’s essential to carefully read the owner’s manual, paying particular attention to safety precautions and procedures.
Before you start, ensure you have the right tools for the job. These are the standard tools that you’ll need:
- Indoor unit – The indoor unit is mounted on the wall inside the room to be cooled. It is connected to the outdoor unit by refrigerant lines and electrical wiring.
- Outdoor unit – The outdoor unit contains the compressor, which pumps refrigerant through the system. It is mounted on a wall or on the ground outside the building.
- Refrigerant lines – These lines connect the indoor and outdoor units and carry the refrigerant that cools the air.
- Electrical wiring – The indoor and outdoor units need to be connected to a power source.
- Mounting hardware – This includes brackets and screws to mount the indoor and outdoor units.
- Tubing cutter – You will need a tubing cutter to cut the refrigerant lines to the correct length.
- Drill and hole saw – You will need a drill and hole saw to make a hole in the wall for the refrigerant lines and electrical wiring.
- Vacuum pump – Before the system is charged with refrigerant, it needs to be evacuated with a vacuum pump to remove any air or moisture that could cause problems.
- Refrigerant charging equipment – This is used to charge the system with refrigerant.
- Electrical tools – You will need standard electrical tools such as wire strippers, pliers, and screwdrivers to connect the electrical wiring.
- Level and measuring tape – You will need a level to make sure the units are installed properly, and a measuring tape to measure the distance between the units.
The rest of the tools you need include manifold gauges, a vacuum pump, a flaring tool, and a dry nitrogen tank with a regulator. Professional ductless mini-split installation services should have these on hand.
10 Easy-to-follow Steps on How to Install a Ductless Mini-Split Air Conditioner
Thinking of installing your ductless mini-split AC all on your own? Seems like a big challenge but we’re here to guide you! Just follow these 10 easy steps and you’ll be able to install your AC in no time. Just remember, you can always rely on a professional air conditioner maintenance service if you ever encounter any problem with installing your AC.
Step 1 – Choose the location for your indoor unit.
It should be on an inside wall near an exterior wall for maximum efficiency. Make sure the location is free from obstructions and there’s enough clearance for the air to circulate freely.

Step 2 – Install the mounting bracket for the indoor unit on the wall.
Use a level to ensure that the bracket is installed straight and level. Follow the manufacturer’s instructions for securing the bracket to the wall.

Step 3 – Drill a hole through the wall for the refrigerant lines, electrical wiring, and drain line.
Use a hole saw or a reciprocating saw to make the hole. Make sure the hole is large enough to accommodate all the necessary components.

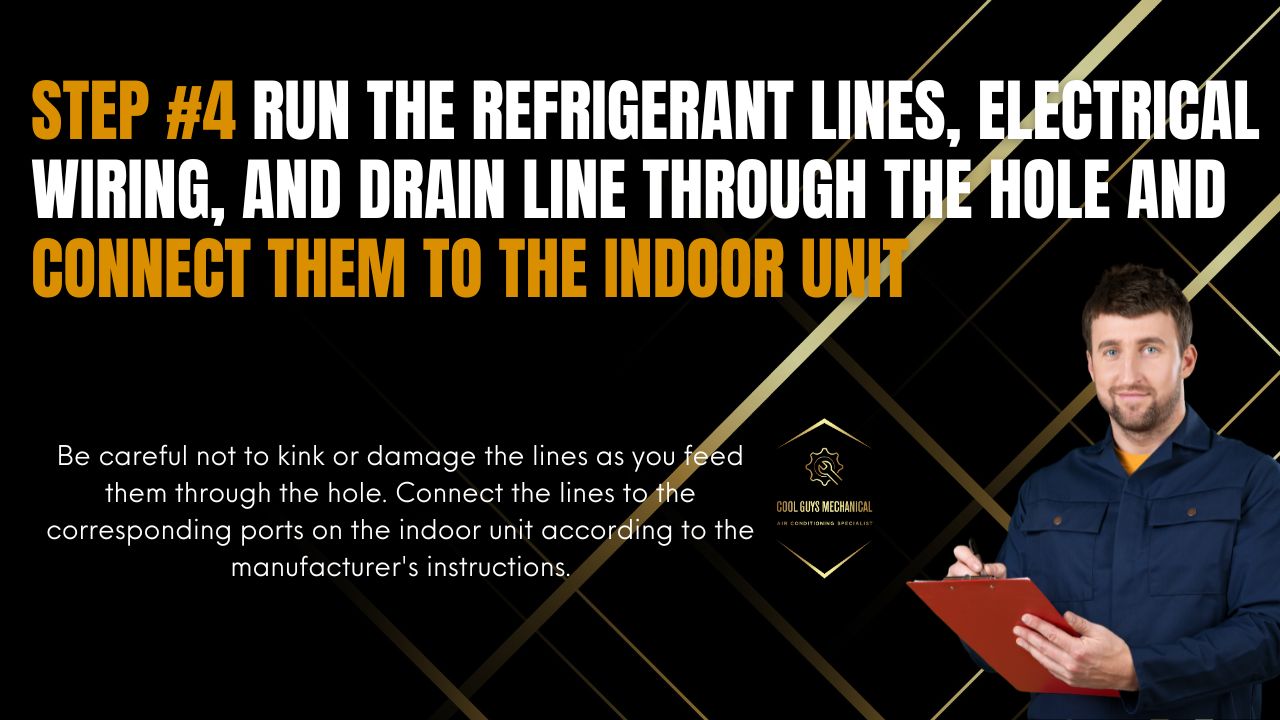
Step 4 – Run the refrigerant lines, electrical wiring, and drain line through the hole and connect them to the indoor unit.
Be careful not to kink or damage the lines as you feed them through the hole. Connect the lines to the corresponding ports on the indoor unit according to the manufacturer’s instructions.
Step 5 – Mount the outdoor unit on a flat surface outside the house.
Choose a location that’s close to the indoor unit and has enough clearance for the air to circulate freely. Follow the manufacturer’s instructions for securing the unit to the mounting surface.

Step 6 – Connect the refrigerant lines from the outdoor unit to the indoor unit.
Use a flaring tool to flare the ends of the refrigerant lines and connect them to the corresponding ports on the outdoor unit. Make sure the connections are tight and leak-free.

Step 7 – Connect the electrical wiring from the outdoor unit to the indoor unit.
Follow the manufacturer’s instructions for wiring the units together. Make sure the wiring is properly grounded and all connections are secure.

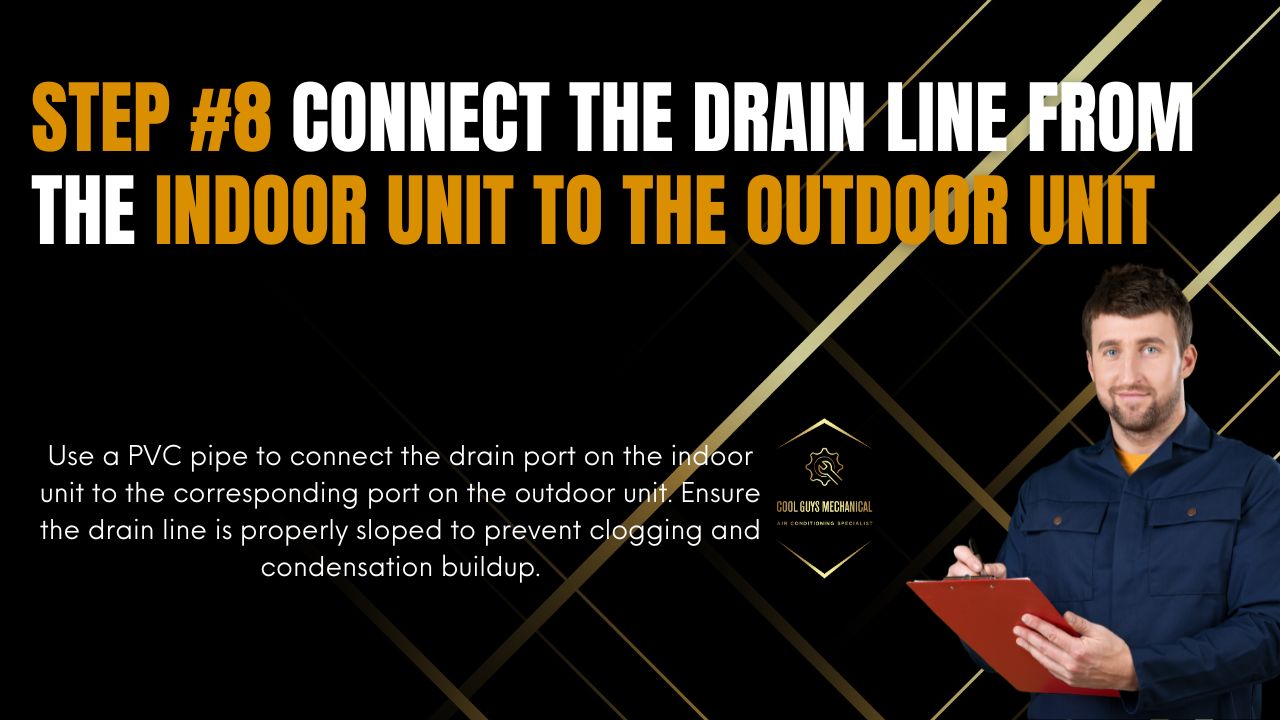
Step 8 – Connect the drain line from the indoor unit to the outdoor unit.
Use a PVC pipe to connect the drain port on the indoor unit to the corresponding port on the outdoor unit. Ensure the drain line is properly sloped to prevent clogging and condensation buildup.
Step 9 – Turn on the power to the outdoor unit.
Follow the manufacturer’s instructions for turning on the power to the unit. Make sure the unit is properly grounded and all electrical connections are secure.

Step 10 – Test the system to make sure it’s working properly.
Turn on the unit and check that cool air is coming from the indoor unit. Monitor the unit for any leaks or unusual noises. Adjust the settings as necessary to achieve the desired temperature and airflow.
Installing a ductless mini-split air conditioner can be a complex process that requires specialized tools and knowledge. Taking on a challenge of this capacity is good but it’s always better to consult the installation instructions that come with your unit. Or better yet, hire a professional AC technician to install it for you. The last thing you want would be to install your AC the wrong way and waste your time and effort in doing so.
If you need help installing your ductless mini split AC, you can always count on Cool Guys Mechanical to do a great job. Call now to consult with an expert for all your AC needs.